Sending notifications
Overview
To start, make sure the package is installed -
@livewire('notifications')should be in your Blade layout somewhere.
Notifications are sent using a Notification object that's constructed through a fluent API. Calling the send() method on the Notification object will dispatch the notification and display it in your application. As the session is used to flash notifications, they can be sent from anywhere in your code, including JavaScript, not just Livewire components.
<?php

namespace App\Livewire;

use Filament\Notifications\Notification;
use Livewire\Component;

class EditPost extends Component
{
    public function save(): void
    {
        // ...

        Notification::make()
            ->title('Saved successfully')
            ->success()
            ->send();
    }
}

Setting a title
The main message of the notification is shown in the title. You can set the title as follows:
use Filament\Notifications\Notification;

Notification::make()
    ->title('Saved successfully')
    ->send();
Or with JavaScript:
new FilamentNotification()
    .title('Saved successfully')
    .send()
Setting an icon
Optionally, a notification can have an icon that's displayed in front of its content. You may also set a color for the icon, which is gray by default:
use Filament\Notifications\Notification;

Notification::make()
    ->title('Saved successfully')
    ->icon('heroicon-o-document-text')
    ->iconColor('success')
    ->send();
Or with JavaScript:
new FilamentNotification()
    .title('Saved successfully')
    .icon('heroicon-o-document-text')
    .iconColor('success')
    .send()
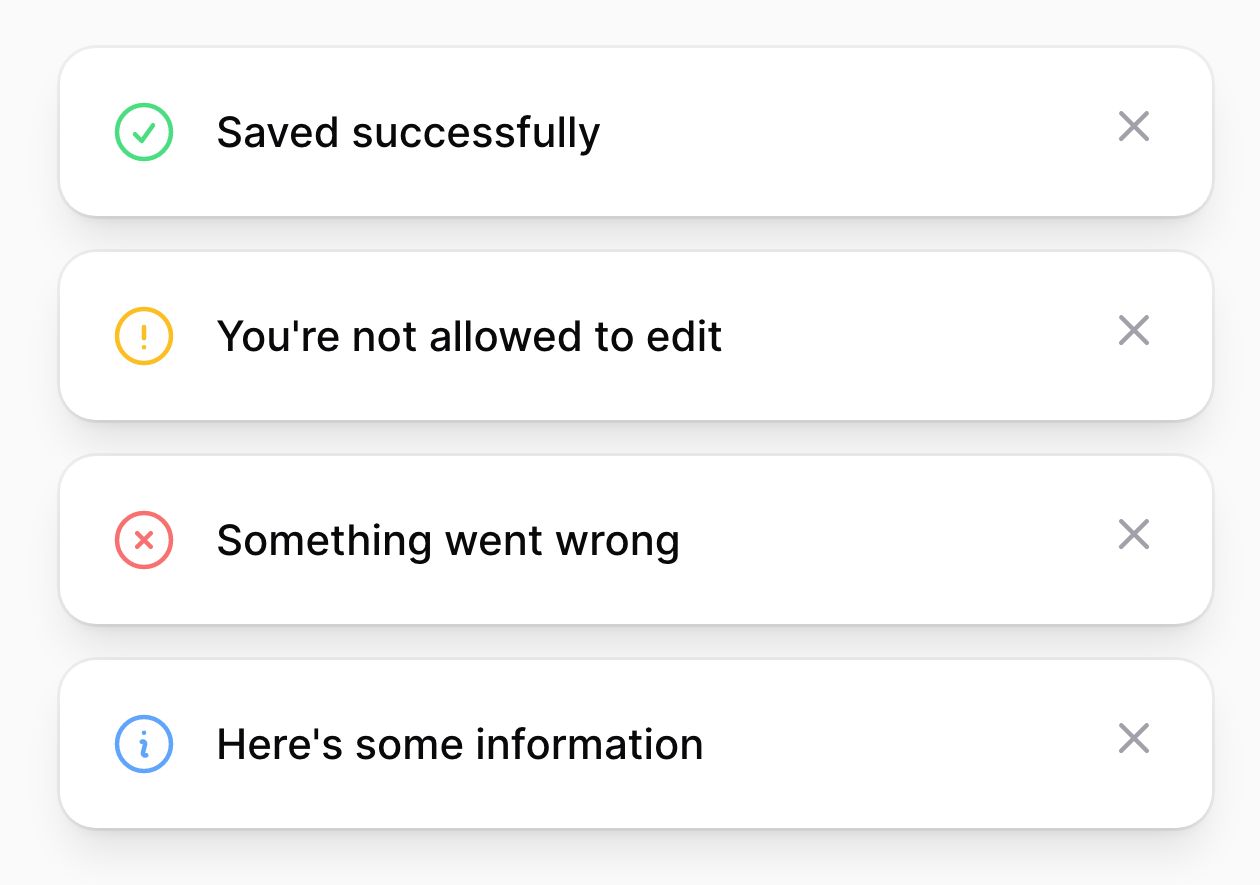
Notifications often have a status like success, warning, danger or info. Instead of manually setting the corresponding icons and colors, there's a status() method which you can pass the status. You may also use the dedicated success(), warning(), danger() and info() methods instead. So, cleaning up the above example would look like this:
use Filament\Notifications\Notification;

Notification::make()
    ->title('Saved successfully')
    ->success()
    ->send();
Or with JavaScript:
new FilamentNotification()
    .title('Saved successfully')
    .success()
    .send()

Setting a background color
Notifications have no background color by default. You may want to provide additional context to your notification by setting a color as follows:
use Filament\Notifications\Notification;

Notification::make()
    ->title('Saved successfully')
    ->color('success') // [tl! focus]
    ->send();
Or with JavaScript:
new FilamentNotification()
    .title('Saved successfully')
    .color('success') // [tl! focus]
    .send()

Setting a duration
By default, notifications are shown for 6 seconds before they're automatically closed. You may specify a custom duration value in milliseconds as follows:
use Filament\Notifications\Notification;

Notification::make()
    ->title('Saved successfully')
    ->success()
    ->duration(5000)
    ->send();
Or with JavaScript:
new FilamentNotification()
    .title('Saved successfully')
    .success()
    .duration(5000)
    .send()
If you prefer setting a duration in seconds instead of milliseconds, you can do so:
use Filament\Notifications\Notification;

Notification::make()
    ->title('Saved successfully')
    ->success()
    ->seconds(5)
    ->send();
Or with JavaScript:
new FilamentNotification()
    .title('Saved successfully')
    .success()
    .seconds(5)
    .send()
You might want some notifications to not automatically close and require the user to close them manually. This can be achieved by making the notification persistent:
use Filament\Notifications\Notification;

Notification::make()
    ->title('Saved successfully')
    ->success()
    ->persistent()
    ->send();
Or with JavaScript:
new FilamentNotification()
    .title('Saved successfully')
    .success()
    .persistent()
    .send()
Setting body text
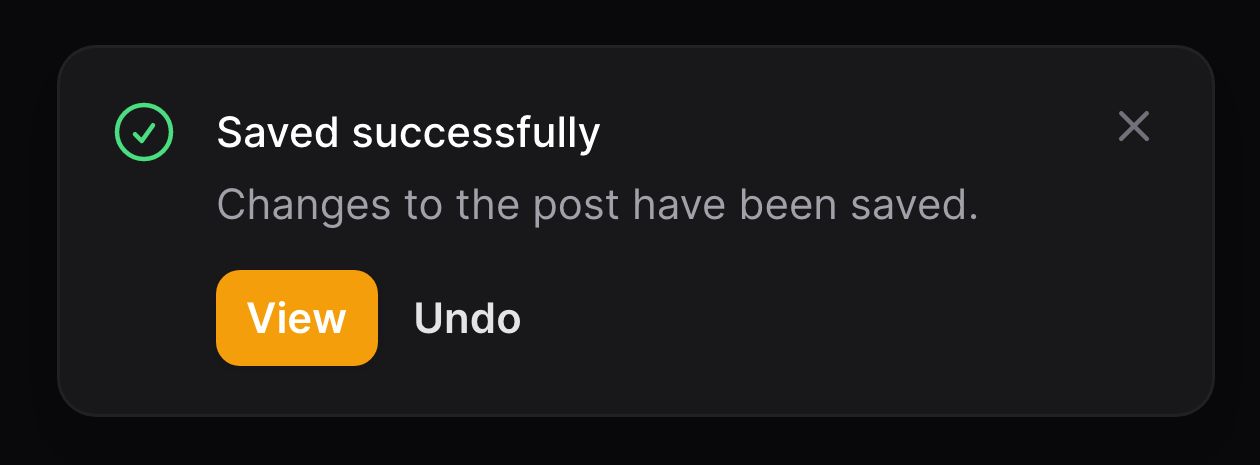
Additional notification text can be shown in the body. Similar to the title, it supports Markdown:
use Filament\Notifications\Notification;

Notification::make()
    ->title('Saved successfully')
    ->success()
    ->body('Changes to the post have been saved.')
    ->send();
Or with JavaScript:
new FilamentNotification()
    .title('Saved successfully')
    .success()
    .body('Changes to the post have been saved.')
    .send()

Adding actions to notifications
Notifications support Actions, which are buttons that render below the content of the notification. They can open a URL or dispatch a Livewire event. Actions can be defined as follows:
use Filament\Notifications\Actions\Action;
use Filament\Notifications\Notification;

Notification::make()
    ->title('Saved successfully')
    ->success()
    ->body('Changes to the post have been saved.')
    ->actions([
        Action::make('view')
            ->button(),
        Action::make('undo')
            ->color('gray'),
    ])
    ->send();
Or with JavaScript:
new FilamentNotification()
    .title('Saved successfully')
    .success()
    .body('Changes to the post have been saved.')
    .actions([
        new FilamentNotificationAction('view')
            .button(),
        new FilamentNotificationAction('undo')
            .color('gray'),
    ])
    .send()

You can learn more about how to style action buttons here.
Opening URLs from notification actions
You can open a URL, optionally in a new tab, when clicking on an action:
use Filament\Notifications\Actions\Action;
use Filament\Notifications\Notification;

Notification::make()
    ->title('Saved successfully')
    ->success()
    ->body('Changes to the post have been saved.')
    ->actions([
        Action::make('view')
            ->button()
            ->url(route('posts.show', $post), shouldOpenInNewTab: true)
        Action::make('undo')
            ->color('gray'),
    ])
    ->send();
Or with JavaScript:
new FilamentNotification()
    .title('Saved successfully')
    .success()
    .body('Changes to the post have been saved.')
    .actions([
        new FilamentNotificationAction('view')
            .button()
            .url('/view')
            .openUrlInNewTab(),
        new FilamentNotificationAction('undo')
            .color('gray'),
    ])
    .send()
Dispatching Livewire events from notification actions
Sometimes you want to execute additional code when a notification action is clicked. This can be achieved by setting a Livewire event which should be dispatched on clicking the action. You may optionally pass an array of data, which will be available as parameters in the event listener on your Livewire component:
use Filament\Notifications\Actions\Action;
use Filament\Notifications\Notification;

Notification::make()
    ->title('Saved successfully')
    ->success()
    ->body('Changes to the post have been saved.')
    ->actions([
        Action::make('view')
            ->button()
            ->url(route('posts.show', $post), shouldOpenInNewTab: true),
        Action::make('undo')
            ->color('gray')
            ->dispatch('undoEditingPost', [$post->id]),
    ])
    ->send();
You can also dispatchSelf and dispatchTo:
Action::make('undo')
    ->color('gray')
    ->dispatchSelf('undoEditingPost', [$post->id])

Action::make('undo')
    ->color('gray')
    ->dispatchTo('another_component', 'undoEditingPost', [$post->id])
Or with JavaScript:
new FilamentNotification()
    .title('Saved successfully')
    .success()
    .body('Changes to the post have been saved.')
    .actions([
        new FilamentNotificationAction('view')
            .button()
            .url('/view')
            .openUrlInNewTab(),
        new FilamentNotificationAction('undo')
            .color('gray')
            .dispatch('undoEditingPost'),
    ])
    .send()
Similarly, dispatchSelf and dispatchTo are also available:
new FilamentNotificationAction('undo')
    .color('gray')
    .dispatchSelf('undoEditingPost')

new FilamentNotificationAction('undo')
    .color('gray')
    .dispatchTo('another_component', 'undoEditingPost')
Closing notifications from actions
After opening a URL or dispatching an event from your action, you may want to close the notification right away:
use Filament\Notifications\Actions\Action;
use Filament\Notifications\Notification;

Notification::make()
    ->title('Saved successfully')
    ->success()
    ->body('Changes to the post have been saved.')
    ->actions([
        Action::make('view')
            ->button()
            ->url(route('posts.show', $post), shouldOpenInNewTab: true),
        Action::make('undo')
            ->color('gray')
            ->dispatch('undoEditingPost', [$post->id])
            ->close(),
    ])
    ->send();
Or with JavaScript:
new FilamentNotification()
    .title('Saved successfully')
    .success()
    .body('Changes to the post have been saved.')
    .actions([
        new FilamentNotificationAction('view')
            .button()
            .url('/view')
            .openUrlInNewTab(),
        new FilamentNotificationAction('undo')
            .color('gray')
            .dispatch('undoEditingPost')
            .close(),
    ])
    .send()
Using the JavaScript objects
The JavaScript objects (FilamentNotification and FilamentNotificationAction) are assigned to window.FilamentNotification and window.FilamentNotificationAction, so they are available in on-page scripts.
You may also import them in a bundled JavaScript file:
import { Notification, NotificationAction } from '../../vendor/filament/notifications/dist/index.js'

// ...


